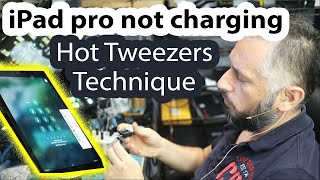
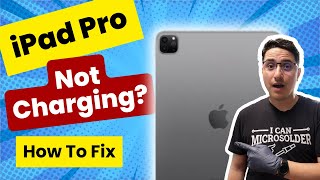
iPad Only Charges When Screen Is On Diagnostics & Repair. Battery Connector Replacement
Video Not Working? Fix It Now
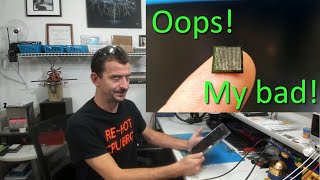
Step by Step process to diagnose and repair an iPad Air 2 that doesn’t charge after a screen repair.
►Check out my new T-Shirts, Hoodies & more: https://merch.vccboardrepairs.com
►Amazon Storefront: https://www.amazon.com/shop/vccboardrepairs-jessecruz
►Join the new Facebook Group for Repair Techs https://vccboardrepairs.com/vcc-fb-group
►Buy Our Seek Macro Lens: https://vccboardrepairs.com/buy-macro-lens
►Let me teach you to Microsolder: https://vccboardrepairs.com/profixerr-course
►Full list of Solder Tools: https://www.vccboardrepairs.com/gear
►Mail us your iPhone/iPad for repair: https://www.vccboardrepairs.com/contact-us
In this video, we’ll show you how to:
✅What to check for when you have charging problems after a screen repair
✅Do you have a loose or wrong battery screw?
✅Do you have a missing battery screw?
✅Are the battery pins damaged?
✅How to replace the battery connector for when it is damaged
✅And more!
🚀Today's shirt can be purchased here: https://merch.vccboardrepairs.com/listing/keep-calm-and-fix-phones?product=46
This process is virtually the same for the all iPads with this style of connector:
iPad 2 iPad 3 iPad 4 iPad 5 iPad 6 iPad 7 iPad 8 iPad 9
iPad Air 1, Air 2, Air 3, Air 4
iPad Pro 9.7, iPad Pro 10.5, iPad Pro 12.9 1st Gen, iPad Pro 12.9 Gen 2
It does not apply to iPad Mini, as those are FPC style connectors.
What repair would you like me to do next? Let me know in the comments below!
🛠Common Soldering Tools I use:
✫ Parco Microscope Complete Kit: https://amzn.to/3qXrGb0
✫ Hot Air Station Quick 861DW: https://www.injuredgadgets.com/quick-861dw-hot-air-rework-station/?acc=3d2d53e5abcd70e24cc444935b88e6ac21
✫ Soldering Iron Station Hakko FM203: https://www.injuredgadgets.com/fm-203-dual-port-soldering-station-only/?acc=3d2d53e5abcd70e24cc444935b88e6ac21
✫ Hakko BC1 Bevel Tip: https://www.injuredgadgets.com/hakko-t15-bc1-bevel-tip/?acc=3d2d53e5abcd70e24cc444935b88e6ac21
✫ AOR Curved Reverse Tweezers: https://www.injuredgadgets.com/ceramic-desoldering-tweezer-aor-t-001/?acc=3d2d53e5abcd70e24cc444935b88e6ac21
✫Super Low Melt Solder Wire (138C): https://www.injuredgadgets.com/mechanic-soldering-x-series-wire-xw5-40g-0-5mm/?acc=3d2d53e5abcd70e24cc444935b88e6ac21
✫ Kester 63/37 0.8mm Solder Wire (183C): https://amzn.to/365b7AA
✫ Genuine Amtech 559 Flux: https://www.injuredgadgets.com/catalog/product/view/_searchanise/1/id/22225/s/amtech-nc-559-asm-tf-no-clean-tacky-solder-flux-with-uv-tracer-10-cc-syringe/?acc=3d2d53e5abcd70e24cc444935b88e6ac21
✫ Cleaning Wipe Towels:
https://www.injuredgadgets.com/catalog/product/view/id/12606/?acc=3d2d53e5abcd70e24cc444935b88e6ac21
✫ Desoldering Wick Braid: https://amzn.to/3FU8ilf
✫ 99% Isopropyl Alcohol: https://amzn.to/3oOf1Yn
✫ Needle Drip Bottle: https://www.injuredgadgets.com/flux-bottle-for-pro-skit-ms-035/?acc=3d2d53e5abcd70e24cc444935b88e6ac21
✫ Check out my Amazon Storefront: https://www.amazon.com/shop/vccboardrepairs-jessecruz
✫ And my site for more suggested tools: https://www.vccboardrepairs.com/gear
► Like us on Facebook: https://facebook.com/vccboardrepairs
► Follow us on Instagram: https://instagram.com/vcc_board_repairs
⚠ B2B & Wholesale pricing for mail in repairs is available for repair shops in the USA. Contact us for more information: https://www.vccboardrepairs.com/contact-us
Please note: This page contains affiliate links. If you choose to make a purchase after clicking a link, I may receive a commission at no additional cost to you. Thank you for your support!
0:00 Intro
1:05 Symptoms to check for
3:14 Best way to disconnect the battery
3:55 Inspecting the battery connector
8:11 Removing the battery connector
14:00 Wicking the pads
17:20 Installing the new connector
20:29 Testing to confirm it's fixed
Comment