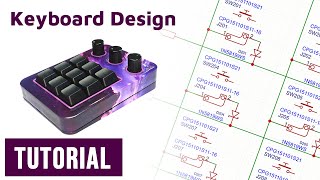
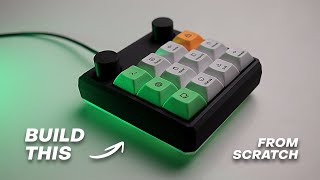
Tutorial - Custom DIY Keyboard Design and Build: Schematic + PCB + Case | Part 1 - RP2040
Video Not Working? Fix It Now
In this tutorial you will design and build your own keyboard. You will also learn all the essentials to design and build any electronics. Enjoy!
Links:
- Do you have any questions? Ask them on our Discord here: https://discord.gg/8a8dUcHmrx
- Learn Schematic design and PCB layout from FEDEVEL Online courses: https://fedevel.com/courses
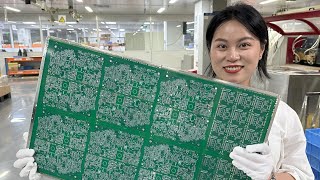
- The case is 3D printed at @JLC3DP and PCB is manufactured by @JLCPCB
Downloads:
- Finished project (EasyEDA): https://oshwlab.com/robertferanec/custom-keyboard
- Github (HW + 3D + SW): https://github.com/FEDEVEL/custom-keyboard
- Thingiverse (3D): https://www.thingiverse.com/thing:6784228
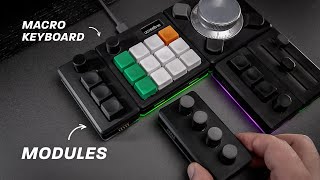
Other parts of this tutorial:
- Part 1: Schematic - RP2040 (this video) https://youtu.be/N4cLFE0FF2U
- Part 2: Schematic - Keyboard https://youtu.be/rMoTqSC9wrY
- Part 3: PCB - Component Placement https://youtu.be/nMwamrZE_rc
- Part 4: PCB Layout https://youtu.be/owdtLw_EZdU
- Part 5: PCB Layout improvement https://youtu.be/d8C-tk0B4Qg
- Part 6: Case / Box design https://youtu.be/4v2gWze6xi4
- Part 7: Manufacturing https://youtu.be/bpns0GSR_zI
- Part 8: Building https://youtu.be/sfcFgt5RZbM
Link to the complete playlist: https://www.youtube.com/playlist?list=PLXvLToQzgzdftro2qK5In8p6ExsDFdpzw
CONGRATULATIONS! You designed and built your own keyboard. Well done!
Follow up / BONUS videos:
The follow up videos are not needed to build your keyboard. However I still would like to create them as they can be helpful. So when I have time or if this tutorial gets more views I will record them.
- BONUS: Customizing software for your QMK keyboard
- BONUS: How to add a custom image on your case / box
- BONUS: More details about 3D design (if enough people are interested I can make additional videos about how to design a nice enclosure, keycaps, knobs, etc ...)
If you would like to see the BONUS videos, please let me know in comments.
Chapters:
00:00 What is this tutorial about
03:34 Starting a new project
08:42 Adding RP2040
14:43 Adding 100nF
20:12 Adding 2.2uF
23:14 Adding 200R
25:43 Adding 27R
27:40 Adding USB-C connector
31:25 Adding ESD protection
34:03 Adding 1uF
36:10 Connecting USB CC pins
36:46 Adding 5.1k
38:21 Voltage regulator 5V to 3V3
42:27 Adding 47uF
45:49 Crystal ABM8-272-T3
47:22 Adding 1k
48:32 Adding 15pF
49:48 Adding 1M
52:52 Flash W25Q128JVS
58:20 Boot Select Button
1:01:09 Adding 100k
1:03:10 Reset Button
1:04:28 Adding 10k
1:08:23 Adding 1x3 Header
1:11:50 User LED
1:15:06 Power LED
1:16:38 Thank you for watching
------------------------------------------------------
Would you like to support me? It's simple:
- Sign up for online courses hosted on our platform: https://fedevel.com/
- You can also support me through Patreon: https://www.patreon.com/robertferanec
It is much appreciated. Thank you,
- Robert
Comment