Влюбилась в эти подушки с первого взгляда. В магазине такие не купить, сразу 3 идеи
Video Not Working? Fix It Now
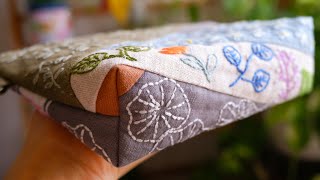
1) I saw a pillowcase in a Turkish hotel and immediately fell in love. I am sharing instructions on how to sew a pillowcase in Turkish style (beautiful, quick and easy).
Here's how it's done:
- For a pillow 50x70 cm, you will need a strip of fabric measuring 146x53 cm, as well as two pieces 20x53 cm, they will cover the pillow. You also need 4 strips of 8x40 cm for ties.
- First, I folded the main part of the pillowcase along the 53 cm side and stitched it on both sides. I sewed the seams with an overlocker. Now all purchased bedding sets are sewn in this way, despite the fact that there is a special linen seam, but everything changes over time.
- Next I sewed 4 ties.
- On the open side of the pillowcase, I marked 11 cm from the side seams and sewed on the ties.
- Next, I stitched together the details for the smell; here I used a linen stitch.
- I turned one edge and stitched it.
- I joined the two blanks right sides together and stitched them in a circle.
- Then I put the scent inside and laid a stitch along the edge of the pillow, departing 0.5 cm from the edge.
- The pillowcase fits the pillow like a glove, the flap closes the pillow, and the ties look cute and decorate the product.
Turkish pillowcases can be sewn not only for beds, but also as decorative ones for sofas.
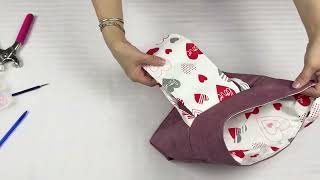
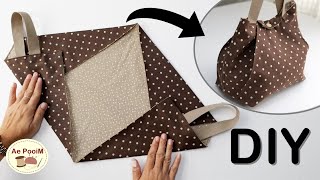
2) How to sew a pillowcase with a zipper. The easiest way that even a beginner can handle.
You can buy bed linen in a store, but the sizes may not always fit. Or the pillowcases and sheets are worn out, but the duvet cover remains intact. Therefore, if you wish, you can sew your own underwear.
The sheet is sewn very simply. You just need to choose the size of the fabric and hem it on all sides. But it’s worth calculating the size of the pillowcase and choosing any sewing method. In my opinion, bed linen is where you should start your sewing exploits.
The first thing to do is measure the size of the pillow and add 2-3 cm on all sides so that the product sits on the pillow with a little freedom.
This master class is designed for a pillow measuring 50x70 cm. This diagram shows everything
calculated. The length is increased by 2 cm on both edges. 4 cm are the folds for the “ears” that will be needed at the end of the work. And 8 cm is an increase in fabric that will cover the zipper. The width is increased by 1 cm for seams and 4 cm for “ears”.
How to sew such a pillowcase?
- First, I overcast the edges of the fabric. I placed a zipper on one edge and stitched it. To sew in a zipper, it is better to use a special foot, which comes with any sewing machine.
- Then I stitched the second part of the zipper. If the zipper is shorter, you need to place it in the middle.
- Next, I folded the fabric so that it covered the zipper, this requires 8 cm.
- To secure this fold, I stitched the fabric in the same way as in the photo. The result is a “pocket” for the pillow to enter.
- The fabric was folded with the right side inward and the side seams were sewn.
- I turned the pillowcase right side out and straightened out all the corners.
- I marked 4 cm on 4 sides and laid a line along the entire perimeter.
The pillowcase with “ears” is ready.
Thanks to these instructions, even a beginner can sew such a pillowcase.
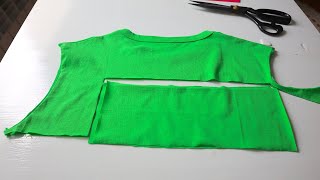
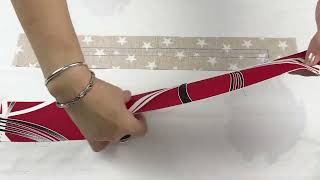
3) An excellent conversion of a simple rustic pillowcase into openwork designs. All this is obtained from straight lines. See how to do it.
Any simple fabric can be laid out, folded and decorated with stitches so that it looks like voluminous lace. It's like drawing from fabric or how a sculptor sculpts his sculptures.
Check out 4 such chic ways.
- I drew the fabric diagonally every 5 cm. I smoothed and stitched these lines, and the width of the foot was approximately 1 cm.
- Then I smoothed out these lines.
- I did the same on the other diagonal, as a result, small squares were obtained at the intersections of the folds.
- Additionally, I sewed beads by hand.
The finished square is 18x18 cm.
- On a strip of fabric 18 cm wide, I ironed lines every 4 cm.
- Then I stitched them to a width of 1 cm. I cut out a square 18x18 cm.
- I pressed the folds in one direction and laid the lines.
- I unfolded it in the center of the fold and pressed it in the opposite direction. I stitched it in the middle.
- This is how it turned out after ironing.
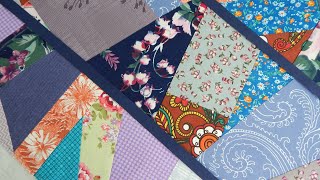
- For such a square, I cut out 8 small squares 11x11 cm. I rolled them diagonally and ironed them.
- I stitched together 2 parts in such a way as to form a large triangle, the equal sides of which are the diagonals of small triangles.
- I folded the resulting triangles in this way and connected them with stitches. The result was a square, the sides of which were stitched, thereby connecting all the parts.
- I smoothed each diagonal inside in the opposite direction.
- I put tulle under the square.
- I stitched the wrapped petals along the edges.
Another type of fabric decoration can be said to be the easiest. The square consists of 8 stripes.
The stripes are crossed with each other. There is a curly stitch on eac
наволочка
наволочки
как сшить наволочку
как сшить наволочки
красивые наволочки
шьем наволочки
шьем наволочки своими руками
подушки
подушка
как сшить подушку
шьем подушку своими руками
pillowcase
pillowcases
how to sew a pillowcase
how to sew pillowcases
beautiful pillowcases
sew pillowcases
sew pillowcases with our own hands
how to sew pillowcases with our own hands.
pillows
pillow
how to sew a pillow
sew a pillow with our own hands
Comment